
I have had my Canon 50D for a year and a half now. It has taken a while to learn all of the camera controls - in fact there is still so much I don't know. I have heard how so many photographers shoot in the RAW format, but I never really understood why it is supposed to be so much better than JPEG.
SO, I took a course to learn about it. And I find it amazing!
I always knew that RAW files were so much bigger than JPEG, so I figured I didn't want to take up so much room on my memory card. Then I didn't really know what to do with the file - since it is not a JPEG. It is a CR2 file. What's that? JPEG seemed so much easier and safer to me.
Now I understand why RAW files are so big. It's because they have SO MUCH MORE information on them. When you don't shoot in RAW, your camera pre-processes the image before you even see it on your camera lcd. And the camera gets rid of a lot of information as it condenses the image to a smaller JPEG image. It gets rid of good stuff that often can make a huge difference in your photos.
I use Photoshop CS5 to make corrections to my photos. To process RAW files, I needed to download free software to convert the CR2 files to DNG files (digital negatives). Then I open them in Adobe Camera Raw (which is part of CS5). Adobe Camera Raw is a program which allows you to process the image, and it is very powerful. Since you have so much more info than a JPEG file, you can take a bad photo and make it look good by just moving a few sliders around.
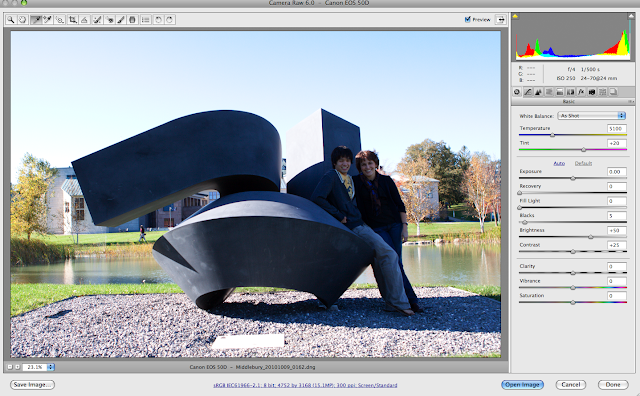
I'll give you an example. Here is a pretty bad photo of Adam and me taken by Kerry this fall.
The sun was really bright and we were standing in the shadow of the sculpture. The picture is way too blue - the white balance is not correct.


If you click on the "Open Image" button, it will take you out of ACR and into Photoshop if needed. Photoshop can do some things that ACR cannot. When you are done, you can save the photo as a JPEG. It will be compressed and much smaller.
There are so many aspects of ACR that make photo processing easier. One of my favorites is batch processing. If you take 50 pictures in the same lighting that need the same corrections, you can correct one of the pictures and then apply the corrections to all 50 pictures at once, with the click of a button. It saves so much time!
Working in the RAW is great! Try it sometime!
I started shooting RAW a few months ago for this very reason...more information. It took a little while to get used to, since you lose some of the sharpness, but it's easily fixed in PS. I shoot Nikon and am able to open my RAW (in Nikon world, called NEF) files in ACR through Adobe Bridge, without having to convert them. Can you do that with your CR2 files? It might save you a step!
ReplyDeleteCheryl, there are no extra steps. Adobe downloader converts the files automatically when I download them from my camera. The reason I use dng files is because you only have one file packaged all together. If you are not using dng, there are 2 files for each image. A DNG file doesn't require a sidecar file. All the metadata, image adjustment instructions, camera profiles, and previews are embedded in the file itself. I guess whatever you prefer, it all comes out the same in the end!
ReplyDeleteAlso, the reason you lose the sharpness when shooting RAW is because your camera pre-sharpens the jpeg image, and the RAW image is untouched.
ReplyDeleteYes, I knew that the camera sharpens the jpeg images. It's still disturbing to see the RAW images before they're sharpened!
ReplyDeleteI guess the conversion to a dng file is something you need for Canon? When I shoot RAW (NEF) files, I only get one file with all metadata, etc. embedded. I'm not sure what you mean by a sidecar file?
I'm interested in this subject...looking at a new body and not sure whether I want to stay with Nikon or try Canon. Post-processing will be a consideration. Thanks for posting this, lots to think about! =]
Moving this conversation to FB!
ReplyDelete